Hot Pocket Sandwiches

Hot Pocket Sandwiches


Hot Pocket Sandwiches

Sandwiches stuffed with vegetables, spicy ham and melted cheese


These sandwiches can be made with any simple bread recipe. Below is the recipe I used.

Prepare the ingredients you want to put inside the sandwiches such as fried eggplant, mushrooms, ham, red pepper, cheese, etc.and let cool if you have cooked them.

Bread recipe:
Bread flour 200 grams
Salt 3 grams
Instant dry yeast 3 grams
Water 130 grams
Butter 15 grams

1. In a bowl, sift together the flour and salt together. Add the yeast then mix in the water.

2. Use a bench scraper to mix and coat the flour. Put on a flat surface and knead for about 10  minutes. Dough should be soft but not sticky. Let rest under a bowl for about 10 minutes.

3. Lightly warm the butter in hands and then put on top of the dough and use a bench scraper to incorporate the butter. Knead again so that the bread is soft & supple. If tough, add a teaspoon of water or so and knead again. Put in a bowl and cover with wrap. Let rise in warm place for 60 minutes.

4. Divide the dough into 80 gram pieces. Roll each piece into a nice ball. Place on the kneading board and cover with plastic and let rise for 20 minutes (bench time).

5. Flatten each ball to remove the air then roll out flat and put some of the vegetable ingredients on one side of the bread and top with cheese and then fold over the other side of the bread and seal. Brush with egg.

6. Cover with plastic and place in a warm place. Should rise again for about 45 minutes.

7. Heat oven to 210 degrees Celsius. Bake for about 20 - 25 minutes until browned.

A little wine and salad to accompany
the sandwich
Read more »
Kathy
0 Comments
Popping Popovers

Popping Popovers


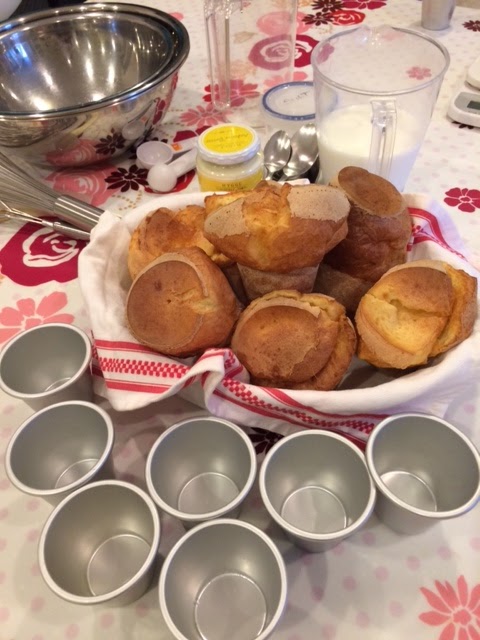
This finished product with prep materials
Too long since the last post. Apologies. Life and work has been too busy:)

I have discovered Popovers! I tried making these a couple of years ago and must have had a bad recipe and they did not turn out well at all. This last week had to make popovers for a demonstration on a TV program and this time around they were much improved.

There are just a couple important points which ensure a successful batch of popovers everytime which I will share.

The recipe only has 4 ingredients so can't get much simpler than that.


Recipe:
(from Martha Stewart)

Have all of the ingredients at room temperature before combining! You can put the milk in the microwave for a few seconds to warm it up if necessary.

Prepare the baking cups. Metal is preferred to paper. Ligthly butter and flour the inside of each cup.

3 eggs
220 grams (1 1/2 cups) milk
180 grams (1 1/2 cups) flour
1 1/4 teaspoon salt

1. In a bowl, sift together the flour and salt.
2. In another bowl, mix together the eggs and milk. Mix together with a whisk for 2 - 3 minutes until everthing is well combined.
3. Mix the flour/salt mixture into the milk mixture in portions using a whisk. Stir for 2 - 3 minutes until everthing is well combined. Do not over mix.
4. Heat the oven to 210 degrees Celsius and place the cups into the oven for about 6 minutes so that they are hot! The butter will become a little browned.
5. After heating the cups, pour the mixture into the cups about 1/3 full and return to the oven. Bake at 210 degrees Celsius for 20 minutes then reduce to 170 degrees Celsius for another 20 minutes to bake further. Do not open the oven while baking since the air will be released.
6. When finished baking, immediately remove from the baking cups and poke with a toothpick to release the air.

These are best eaten while they are warm. Enjoy!!

Marmalade goes very well with the Popovers

Baking together with new friend from NHK

Read more »
Kathy
0 Comments
Mom's Best Apple Streusel Pie

Mom's Best Apple Streusel Pie


Delicious Crispy Topping on
the best Apple Streusel Pie
As I mentioned before, apples pies are one of my favorite desserts, doesn't matter what the recipe is.

Japan is a big producer of apples but there isn't a long a tradition of baking pies here though. Northern Japan in the Aomori area is the largest apple production region in the country. Since most people in Japan eat fresh apples instead of baked ones, the most popular apple sold is the Fuji apple. Unfortunately, this is not the best apple for baking.

Recently, I found Bramley apples in Japan. These apples originated in Britain and have found their way to Japan. They taste similar to Granny Smith apples, i.e. tangy & tarty - just what I like for baking. Now that I found a good baking apple, this is what I use.

I am including the recipe to make the dough, but if you need to save time feel free to use a store bought crust.

18 - 20 cm baking dish

Dough:

200 grams flour
100 grams butter cut into cubes (cold)
1 egg
5 grams salt
10 grams sugar

1. In a food processor, pulse together the butter and flour. Then add the salt and sugar. Lastly, add the egg.  Put the ingredients on a board and gently knead everything together so the dough is smooth. Wrap in plastic and refrigerate for about 40 minutes before using.

Streusel Topping:

30 grams flour
20 grams powdered sugar
2 tablespoons brown sugar
1 teaspoon baking powder
30 grams butter
30 grams chopped walnuts

1. In a food processor, add all of the ingredients except the walnuts and give a short pulse to mix everything thoroughly. Put in a bowl and add the walnuts.

Apple Filling:

4 -5 apples (peeled, cored and sliced)
2 tablespoons flour
1 tablespoon granular sugar
1 tablespoon brown sugar

In a bowl, mix the apples and other ingredients.

Putting together:
1. Roll out the dough to fit the pie pan. Cut the extra dough from the edges and use it take make a nice decoration around the pan.
2. Fill the pan with the apples and sprinkle the streusel filling on top.
3. Bake at 190 Celsius degrees for 20 minutes then reduce the temperature and bake 170 Celsius degrees for another 20 minutes.
4. Let cool completely before slicing.


Calm before the baking storm

Pie shell is ready

Friends joined the baking party

Fitting dough to the pie shell

Roll the dough
Pie with decorations
Read more »
Kathy
0 Comments
Spooky Halloween Jar Cake

Spooky Halloween Jar Cake


Spooky Cake in a Jar
It's never too early to start planning for Halloween. It's not just about being spooky, but the dessert also has to taste good.

I am always looking for new and interesting desserts and I found a great idea on I Am Baker. She gave me the inspiration for this Halloween cake in a jar dessert.

The dessert is quite easy to make. You just need to use your imagination and decorating skills to create a beautiful cake.

This recipe is enough for 4 290 ml jars (I used Weck)

Icing Decoration
10 grams butter (soft)
10 grams powdered sugar
10 grams egg white
10 grams flour

1. Whisk the butter and the powdered sugar, add the egg white then add the flour. Add black coloring.
2. I used a water based marker to draw a design on the outside of the jar and then drew the icing decoration to trace the design on the inside of the jar.
3.  Don't make your lines too thin and keep all of the letters and decoration clear & clean otherwise when the cake bakes the decoration will spread together into a blurry lump.
Outline the decoration inside the jar
4. Put the decorated jars in the refrigerator for about 20 minutes so that the mixture becomes firm.
Yellow Cake
3 eggs
100 grams sugar
100 grams flour
1/2 teaspoon baking powder
50 grams butter
1. Sift the dry ingredients together.
2. Melt the butter in a bowl over simmering hot water.
3. In another bowl, use a hand mixer to mix the eggs and sugar. Whip until they are yellow and fluffy. This takes about 5 - 10 minutes but don't skip this step.

Putting the cake together
1. Remove the jars from the refrigerator and pour the batter evenly between the 3 jars. Bake at 180 degrees Celsius for about 25 minutes.
2. Remove from the oven and let cool.
3. Melt about 50 grams of chocolate in a bowl over simmering hot water until melted. Let it cool until it becomes slightly thickened. Put in a pastry bag for decorating.
4. Draw spider web designs on the top of each cake and add other decorations as you like.

Read more »
Kathy
0 Comments