Delicious Chestnut Loaf Cake


Cake is topped with chestnuts and small gold pieces
I decided that I needed to learn how to cook chestnuts since finding good cooked ones can be difficult
not to mention expensive.

As with many cooking techniques, there is more than one way to achieve the same result. I will explain my process but please feel free to check out options as well such as this one.

Preparing the chestnuts

I used about 30 whole chestnuts. First I peeled the outer shell using a pantry knife to knick the skin lightly then peeled it off. Usually the skin comes off fairly easily.
Outside shell has been removed

Put 6 cups of water plus 15 grams of baking soda into a large pot and bring to a boil. Add the chestnuts and reduce the heat so that it is not boiling. Cook for 15 minutes. Strain the chestnuts from the water and dump the water. Add another 6 cups water plus 10 grams baking soda to the pot and bring to a boil. Add the chestnuts  and reduce heat and cook for 15 minutes. Repeat one more time. The water that the chestnuts is cooked in becomes very dark so be sure not to wear white.

After the last batch of heating the chestnuts, strain the water again. Use the rough side of a sponge to brush off the rough skin pieces from the chestnuts. Don't scratch too hard since knicks in the chestnut do not look as nice for presentation.

Last step is to lightly cook the chestnuts in 5 cups water, 100 grams sugar and about half cup of dark rum. Bring all of these ingredients to a boil and after you removed the rough skin pieces add the chestnuts to this. Again, reduce the heat to a very low temperature and cook for about 45 minutes. Chestnuts should be able to be kept up to 2 weeks in this liquid if kept in the refrigerator.
Chestnuts in hot water


Cake
This cake fits a long rectangle pan (23 cm long x 6 cm high x 4 cm deep)

80 grams butter (slightly softened)
175 grams chestnut paste
80 grams powdered sugar (sifted)
65 grams eggs
45 grams almond powder (sifted)
dash of vanilla essence
20 grams flour (sifted together with baking powder)
2 grams baking powder

1. First, prepare the baking pan by lightly buttering and dusting with flour.

2. Use a hand mixer, and mix the chestnut paste then add the butter in a couple of portions and mix together. Add the almond power and mix - then add the powdered sugar & mix. Mix just enough to incorporate the ingredients, do not over mix.

3. Add in the eggs in portions and mix. Add the vanilla. Lastly, add in the flour and baking powder.

Add pieces of chestnut then add
 remaining dough
4. The easiest way to fill the baking pan is to put the dough in a pastry bag and squirt it in evenly in rows. Fill about 1/3 of the pan then add small pieces of chestnuts in a row in the dough then fill the rest of the pan with the remaining dough.

5. Bake at 160 degrees Celsius for 50 minutes. Check doness before removing from the oven.
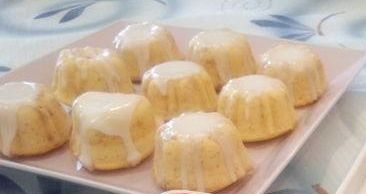
Icing
100 grams powdered sugar (sifted)
15 grams water
10 grams dark rum

1. Mix powdered sugar and water & rum with a small whisk. Brush on the cake.

2. Place in a hot oven (about 190 degrees Celsius) for about 4 minutes just to lightly melt the icing.


Kathy
0 Comments

Halloween Decorated Roll Cake


Chocolate cake with pumpkin cream filling
Time for Halloween decoration.
This roll cake is filled with pumpkin cream and a few pumpkin seeds. I added cinnamon, allspice and nutmeg to the pumpkin puree so it has a tasty pumpkin pie taste to it.

This recipe is fairly quick to put together but if another person is available to help it will go even that much quicker.

This decoration will be piped on top of parchment paper and then the cake itself will be poured over the decoration before baking.  For decorations, either draw on your own or use cookie cutters to make shapes and trace.

Decorations are ready
Decoration:

10 grams soft butter
10 grams powdered sugar sifted
10 grams egg white
10 grams flour sifted
1. Whisk the butter and add the powdered sugar. Add the egg white then add the flour. Divide into different bowls then add coloring.
2. Draw your design on a sheet of paper and place under the parchment paper.
3. Put each color into a separate bag for piping. Your lines should be thin but not too thin, otherwise, they will not show up well after baking.
4. Put this in the refrigerator for about 20 minutes so that the figures becomes firm.

I use a shallow square baking pan (27 cm x 27 cm - height is 2 cm) covered with parchment paper to pipe the decoration on. The recipe below is enough for 2 pans.

Cake:
6 egg yolks
70 grams sugar
100 grams water
6 egg whites
120 grams sugar
100 grams cornstarch
75 grams salad oil (any light oil without a strong taste)
35 grams cocoa powder

1. In a bowl mix the oil and cocoa powder. 
2. In a separate bowl, mix the egg yolks and 70 grams sugar and water. Whip together with a large whisk until the mixture if light yellow and fluffy. This may take 10 minutes or so to get the correct consistency. Don't cheat on this step since the cake will not be light in texture.
3. In another bowl, mix the egg whites and 120 grams sugar. Mix in the sugar in portions and mix until the meringue forms soft peaks.

4. Add the oil mixture (#1) to the egg yolks (#2) and mix with a spatula. Add in the meringue and mix with a spatula - add meringue in portions and mix gently so that the air remains in the batter.  Sift the cornstarch into the mixture and continue to mix with a spatula. 
5. Pour over top of the decoration and bake at 200 degrees Celsius. Do NOT tap the pan on the table to remove air. The cake will not rise well and become fluffy if you do this. 


Custard:
200 grams milk
4 egg yolks
60 grams sugar
20 grams flour
10 grams cornstarch
20 grams butter
120 grams pumpkin puree
12 grams softened gelatin
130 grams fresh cream (36%)
Pumpkin seeds

1. Mix the egg yolks, sugar, flour and cornstarch in a bowl with a small whisk. 
2. Heat the milk until just boiling. Pour the warm milk into the egg mixture then add back to the sauce pan and heat on a low heat until it thickens. Use a small whisk to mix while heating. When it becomes thickened like pudding, turn off the heat and add the pumpkin puree and mix with a whisk. Continue to mix and add the gelatin then add the butter. 
3. Pour int a bowl and let it cool. Whip the fresh cream until it is just starts to become firm. 
4. After the pumpkin cream starts to become cool, add the fresh whipped cream.

Putting Together:
1. Remove the cake from the cooking pan and slowly remove the parchment paper. Use a clean sheet of parchment paper and put the cake on it.
2. Spread the cream on the sponge cake evenly with a palette knife. Sprinkle some pumpkins seeds on top as you like.
3. Start from one end & roll the cake carefully to keep a good shape. Put in plastic wrap and refrigerator for about 1 hour before serving.
Kathy
0 Comments

My Style Tarte Tatin


Not your traditional tarte tatin recipe
Well, this may not look like a traditional tarte tatin, but it sure tastes good. I was making this for a group of 8 friends and I didn't want to be stingy with the servings so I used all of the apples that I purchased. Which I think was about 7 :)

One of the secrets to this recipe is making a deep dark caramel to cook the apples in. Making caramel can be daunting since the temperature of the sugar becomes very hot so it is quite dangerous if you get it on you.

I used a 20 cm round dish (5cm deep). Served 8 people.
Many layered tarte tatin
Dough:
150 grams sifted flour
75 grams cold butter
30 grams sugar
pinch of salt
1 egg

1. Mix the flour and butter together using a pastry cutter or with your fingers. Mix so that the mixture is like fine crumbs.
2. Add in the sugar and egg and continue to mix with the pastry cutter. Put on a pastry board and lightly knead so that it is well mixed.
3. Wrap in plastic and let rest for 30 minutes to 1 hour before using.

Preparing the Apples:
1. Please reduce the number of apples if you need to make less.  I used 7 apples for this recipe.
2. Peel the apples and remove the inner core. Cut in 8 pieces.
3. Make the caramel. Put 80 grams of sugar into a flat frying pan and heat until it turns dark & liquid. Remove from the heat and add 80 grams of butter to the caramel. Put back on a low heat while the butter melts.
4. Add pieces of apple until you fill the pan. Do not overlap the apples too much. Cook the apples on each side in the caramel until they become lightly softened.

Cooking the apples in the caramel

5. Remove apples  as they finish cooking and add new ones.
6. Continue cooking like this until all of the apples are cooked.
7. Pour the leftover caramel into the bottom of the baking ban. Let it cool and remove the butter if you want the dessert to be less rich.


Put the apples on a grill to remove the excess caramel
8. As the apples cooks, place them on a grill so the excess caramel drips into a pan.

9. Prepare the baking pan. As mentioned above, pour the remaining caramel into the bottom of the baking pan. Line the pan with layers of apple - fit the apples together so that the shape is nice.
10. After you finish one or two layers, use a spoon to push down the apples so that they space between them is removed. Keep doing this until the baking pan is filled.
11. Roll out the dough to fit just the top of the baking dish. Add to the top of the apples.
12. Bake at 180 degrees for about 20 - 30 minutes.

13. Take the baking pan out of the oven when finished and let cool for about 10 minutes.
14. Please the baking pan upside down on top of a grill so that the juice can flow out naturally. After about 10 minutes, remove the baking pan.
15. If all goes well, the baking pan will lift off without any apples sticking to it :)
16. Serve with vanilla ice cream if you like.
Kathy
0 Comments

Hearty Potato Bacon Quiche


Layers of potato, ham & spinach add a great flavor
If you are tired of traditional quiches and looking for a new twist try this recipe. This quiche has layers of potato, spinach and ham. Also, the traditional milk has been replaced with a Béchamel sauce which gives it a nice deep flavor.

If you serve this quiche with just a soup and salad, you would still have a hearty dinner. Also, this is great to make ahead of time and just pop in the microwave for a few seconds before serving.

I have skipped cheese in this recipe to save on calories but feel free to add it back.

This is a recipe that allows for personalization -- substitute the spinach with asparagus or eggplant, etc.

Here you go for the recipe:

Crust:
200 grams sifted flour
85 grams butter cut into cubes (cold)
1 egg
pinch of salt and sugar

1. If you use a food processor, add the flour to the processor bowl with the cold butter and sugar and salt and quickly blend. Add in the egg and blend again.
2. Remove from the bowl and lightly knead together to mix well and then cover with plastic wrap. Put in the refrigerator for about 30 minutes before rolling out.

Filling:
3 potatoes
4 eggs
1/2 package fresh spinach
150 grams ham or bacon
1 onion
35 grams flour
300 cc milk

1. Peel and slice the potatoes. Boil until just soft. Drain.
2. Wash the spinach and remove the stems.
3. Fry the ham (or bacon) until just browned. Drain on a paper towel.
4. Slice the onion and fry in a pan with about 1 tablespoon of olive oil until soft. Add the flour and mix with a spoon - slowly add in the milk and mix until the mixture starts to thicken. Turn off the heat.
5. Mix the eggs in a bowl and add #4 above in portions and mix with a small whisk.
6. Roll out the dough to fit a 20 cm tart pan. Fit the dough around the inside of the tart pan and cut off the extra.
7. Spread a little of the egg mixture to the bottom of the tart pan then layer with potatoes, ham, spinach. Add more of the egg mixture and another layer of the ingredients.
8. Pour the remaining egg mixture on top and bake at 180 degrees Celsius for about 40 minutes.

Hearty dinner or lunch!
Kathy
0 Comments

Deep Chocolate Loaf Cake


Just add coffee to this cake for the perfect match
No, it's not time for Christmas just yet. I had some pistachios & pecans in the refrigerator so I used them for decoration.

I know I say this about each recipe, but this cake IS really tasty. I put it together in less than 30 minutes - a really quick and easy dessert.

It is still hot in Tokyo so baking was a chore. Hopefully, it will be cooling off in the days to come.

The good news we had this morning is that Tokyo won the bid for the 2020 summer Olympics. It is seven years from now but I am looking forward to being in a city with the Olympics. Everyone in Japan is quite excited and looking forward to making the dream a reality.

Anyway, here is the cake recipe.


Chocolate Loaf Cake

160 grams milk chocolate
70 grams butter (room temperature)
45 grams sugar
2 eggs
100 grams sifted flour
2 grams baking powder
35 grams candied orange peel
65 grams dried figs (diced)
20 grams Grand Marnier liquor
55 grams milk

1. Mix the flour and baking powder together and sift.
2. Mix the eggs & milk together. Soak the orange peel and dried figs in the Grand Marnier liquor.
3. Melt the milk chocolate in a bowl over a sauce pan of hot water which is lightly boiling. The bowl should not touch the hot water. Use a spatula to mix the chocolate while melting.
4. Remove the chocolate from the hot water and gradually add in pieces of butter. Use a small whisk to mix in the butter. Put the chocolate back over the hot water if the butter does  melt fully.
5. Gradually add the egg/milk mixture into the chocolate and mix with a small whisk each time you add the mixture. Add the sugar.
6. Add the sifted flour and mix well.  Add in the orange peel/dried figs.
7. Pour into a lightly buttered/floured pound loaf pan.
8. Bake at 170 degrees Celsius for about 40 minutes.  Check if the cake is thoroughly cooked before removing from the oven.


Kathy
0 Comments

Honey and Nut Banana Muffins


Nut topped banana muffins
A good point about banana muffins is that the overripe bananas are naturally sweet so you don't need to add much sugar to the recipe.

I like this recipe since sugar is replaced with honey and pecan nuts are used instead of walnuts. Overall,  this recipe is very tasty.

Also, this is super quick to put together so a great recipe for a weekend morning when you have a few extra minutes to prepare breakfast.

Be creative and add raisins or chocolate chips as you like.

Recipe:

3 overripe bananas
1/3 cup honey
1/3 cup melted butter
1/3 cup butter milk
1/2 tsp vanilla
1 3/4 cup sifted flour
1/2 teaspoon baking soda
1/2 teaspoon baking powder
1/2 cup chopped pecans

Fill baking cups and add nuts on top
1. Sift the flour and baking powder & baking soda together in a bowl.

2. Mash the bananas in a bowl and slowly add in the honey and mix with a whisk.
Add the milk and vanilla and continue to mix. Lastly, add the butter and mix well.

3. Add in the flour mixture to #2 and mix well. Fill baking cups about 90% full. Sprinkle the nuts on top.

4. Bake at 180 degrees celsius for about 15 - 20 minutes.


Ready for breakfast!
Kathy
0 Comments

Mini Lemon Bundt Cakes


Mini bundt cakes are ready for serving
By taking the traditional bundt recipe and replacing the baking pan, picture perfect individual cakes are ready for guests.

In this recipe, I have also added diced candied lemon peel to add an extra zippy taste. Be creative when you bake and add or substitute flavors to match what is in your kitchen. I think these would also taste great substituting with orange peel or ginger.

These take only about 20 minutes to put together so keep this recipe on hand for when you need a quick dessert.

Recipe

190 grams flour
120 grams butter
1 teaspoon baking powder
Mini cake pan
1/4 teaspoon salt
3 eggs
100 grams candied lemon peel
50 grams butter milk (add lemon juice to regular milk if buttermilk is not available)
125 grams sugar

1. Prepare the baking pan by lightly coating it with butter. Generously sprinkle flour inside the pan.

2. Sift together the flour, baking powder and salt.

3. Mix the softened butter with the sugar. Add the eggs in portions and mix with a whisk. Add the buttermilk and mix. Add the flour and mix with a spatula. Add the lemon peel.

4. Pour the mixture into the baking pan and bake at 180 degrees Celsius for 25 - 30 minutes depending on the size of your pan.

5. After the cake cools,  remove from the pan.
The batter takes about 10 minutes to mix together
Icing
50 grams powdered sugar
Lemon juice or lemon liquor such as Limoncello (1 - 2 tablespoons as needed)

1. Mix the powdered sugar with the liquid. Adjust so that the consistency is not too wet or dry. It should pour on the cakes smoothly but not like water.
2. Put in the oven at 160 degrees Celsius for about 6 minutes to harden the icing. Do not overcook.

Kathy
0 Comments

Crispy Tomato Olive Oil Bread


Bread is ready - just add guests
This bread is quite easy to make and can be prepared a day ahead.

The problem is that it is too tasty and is eaten so quickly that you need to make a large quantity so that you don't run out too soon into the party.

I made the dough the day before and just did the final preparations the morning before guests arrived.

Also, feel free to change the toppings as you like - green peppers, meat, etc. are all great ingredients to try too.

The recipe below makes 3 pieces (160 grams each). You can increase the recipe to adjust to your guests as needed.


Recipe
260 grams bread flour
5 grams salt
4 grams instant dry yeast
80 grams room temperature water
50 grams olive oil
80 grams milk (room temperature)

1. Sift the flour into a bowl. Add the salt, yeast, and water and start to mix. Add in the olive oil & milk and finish mixing. Use a bench scraper to mix everything together.
2. Put the dough onto a flat board and knead for about 10 minutes. Roll into a nice firm ball and place in a bowl and cover with plastic wrap.
Use a fork to make holes in the bread
before adding the topping
3. You can either put the bowl in the refrigerator if you plan to use the next day or leave the bowl in a warm place (about 28 degrees Celsius) for one hour for the dough to rise.
4. After rising, cut the bread into 160 gram pieces. Roll into small balls and place under plastic wrap for 20 minutes for a short rise (bench time).
5. You can prepare the topping while waiting for the process above, i.e. slice the tomatoes, red peppers,  etc.
6. Flatten each piece by using a rolling pin to make a nice shape.
7. I made a spread of chopped onions, capers & anchovy
sauce which is spread on the bottom before adding other ingredients.
8. Bake at 200 degrees Celsius for about 30 minutes or until browned & crispy.
The topping here is fresh tomatoes, black olives,
red peppers, and chopped onions/capers
which is spread on the bottom

Serve with a cold glass of beer!
Kathy
0 Comments

Reduced Sugar Carrot Cake


Carrot cake doesn't need a lot of extra sugar for sweetening. The spices, fruits and carrots help to add a natural sweetness.

Also, when the cake is topped with a sweet cream cheese icing then reducing the sugar in the cake helps to keep the sugar in check.

I'm not saying this is a diet cake, but just a few hints to save extra calories.

Recipe:

290 grams flour
110 grams brown sugar
120 grams minced carrot (use food processor for chopping)
30 grams raisins
35 grams chopped walnuts
90 grams reduced fat salad oil
4 eggs
20 grams honey
1 teaspoon each of ginger powder, cinnamon and quatre epices
1 teaspoon baking powder
1/2 teaspoon baking soda
1/2 teaspoon salt

1. Cut the carrots and put in a food processor for chopping.
2. Mix the eggs and sugar well with a hand mixer until yellow and fluffy. Slowly mix in the oil in portions. Lastly, add in the honey and then the carrots.
3. Sift the flour, baking powder, baking soda, salt and spices together. Add to #2 above. Use a spatula to mix together.
4. Pour into the baking pan (first lightly butter and flour the inside of the pan). Bake at 180 degrees Celsius for 30 - 40 minutes.

Cream Cheese Icing:

100 grams cream cheese
25 grams butter (soft)
60 grams powdered sugar

1. Whip together the cream cheese and butter using a whisk or hand mixer. Add in the powdered sugar and continue to mix.
2. Add some flavoring such as ginger powder or lemon to give the icing an extra flavor boost.


Kathy
0 Comments

Light Summer Sponge Cake


Match this cake with your favorite ice cream or fresh fruit
Here is a tasty variation to the traditional shortcake. This cake is quick to put together and has endless possibilities for dessert. Match it with your favourite fruit or ice cream  and your guests will love you.

You can also add flavourings while mixing the cake such as zest from a lemon, orange or fresh ginger to give the cake an added taste bonus.

This recipe makes enough to serve 6 or more people. Use a large round cake pan to bake it in.

Recipe:
200 grams flour (sifted)
60 grams cornstarch
8 eggs
zest of 1 lemon
1 pinch ginger powder
200 grams sugar
1 pinch of saffron powder

1. Prepare the baking pan by coating it with butter. Generously sprinkle granular sugar around the pan.
2. Break the eggs into two separate large bowls. Add 150 grams of sugar to the egg yolks and mix until they are yellow & fluffy. Put the bowl over a pan of simmering water to warm it lightly to help whip the yolks.
3. Add in 100 grams flour, 30 grams starch, lemon zest & spices to #1 and mix with a small whisk.
4. Whip the eggs and gradually add the remaining sugar (50 grams) and until soft peaks form. Add in the remaining cornstarch. Add in 100 grams of flour and mix with a spatula.
5. Add the egg whites to the yolk mixture and mix well with a spatula.
6. Pour the mixture into the baking pan and bake at 180 degrees Celsius for 20 - 25 minutes depending on the size of your pan.
7. After the cake cools, remove from the pan.

Icing:
50 grams powdered sugar
juice from half a lemon

1. Mix the powdered sugar and lemon juice. Adjust either so that consistency is not too wet or dry. It should pour on the cake smoothly but not like water.
2. Put in the oven at 160 degrees Celsius for about 6 - 10 minutes to lightly heat the icing.

Cool & serve with your favourite toppings.

Dessert is ready!!

Kathy
0 Comments

Quickie Cheesecake With Strawberry Topping


Dessert is ready in just a few minutes!
This dessert is super easy and super quick to make. Also, it is very easy to improvise a topping with whatever you may have in your refrigerator.

Gather all of the ingredients and the total time to put this together is about 20 minutes. This is a great recipe for the summer when you want something light and quick.

Recipe:
200 grams cream cheese
200 grams soft tofu (drain water thoroughly)
30 grams sugar
30 grams fresh cream (36%)

Topping:
50 grams fruit puree
50 grams fresh fruit slices
30 grams white wine
6 grams gelatin (softened in water)

1. In a bowl, mix the cream cheese so that it is very soft. Add the sugar and cream and mix well. Add the tofu.

2. Put in a food processor for a few minutes to mix everything well and make a smooth mixtures.

3. Pour into small serving containers and put in the refrigerator.

Topping:
1. In a small sauce pan, put the fruit puree and white wine and heat lightly. Add the gelatin and mix well so that the gelatin is all melted.  Pour into a bowl.

2. Cut the fruit slices and add to #1 above. Take the containers from the refrigerator and pour this evenly on top of each container. Add more fresh fruit slices on top if you like.

Dessert is ready!!


Kathy
0 Comments

Tangy Tropical Passion Fruit Mousse Cake


This cake is summer!
This cake has 4 parts to it.  Each piece is not difficult but it will take at least 2 hours.

This is not for everyone to make, but if you have extra time this is worth trying.

The bottom is a thin layer of pistachio flavored cake. Followed by a passion fruit mousse. The white filling is a yogurt cream mousse and it is all topped by a raspberry mousse.

The sauce on the cake is extra passion fruit puree drizzled over the top.

This cake pairs well with a cup of coffee or an icy pina colada - just depends on your mood.

This recipe is ordered in the most efficient way to make the cake.


Recipe:
One 18 cm x 5 cm cake ring and one 12 cm x 5 cm ring
Put plastic on one side
of the ring and secure with a
rubber band

Prepare the 12 cm ring by lightly oiling the inside of it with salad oil then place plastic wrap at one end and secure with a rubber band.

Yogurt Mousse:
150 grams plain yogurt
10 grams lemon juice
20 grams fresh cream (36%)
6 grams gelatin (softened in water)
dash of vanilla essence

1. In small bowl placed in hot water in a sauce pan on top of the stove, put the lemon juice, softened gelatin and vanilla and stir until it melts. Take off the heat and add the cream - put back over the hot water if it thickens too thickly. Then add this mixture to the yogurt. Mix quickly and pour inside the ring.
2. Put on a plate and put in the refrigerator for at least 30 minutes before using.

Cake:
113 grams almond powder (sifted)
113 grams powdered sugar (sifted)
40 grams pistachio paste
3 eggs (mixed)
4 egg whites
25 grams sugar
30 grams flour (sifted)
30 grams butter (melted over hot water)

1. In a standing mixer (or use a hand mixer), combine the almond powder, powdered sugar and pistachio paste. Mix until blended. Slowly add in the 3 eggs in portions.
2. Make meringue. Whip the egg whites so that they begin to be fluffy then add in the sugar in 4 portions and continue to mix. The egg whites should form soft peaks.
3. Add the meringue to #1 in portions and mix with a spatula. Add in the sifted flour and use a spatula to mix. Add in the melted butter and mix with a spatula.
4. Pour into a large shallow baking pan. Bake at 190 degrees Celsius for 20 minutes.


Passion Fruit Mousse:
165 grams passion fruit puree
12 grams gelatin (softened in water)
10 grams kirsch liquor
30 grams sugar
170 grams fresh cream (36%)

1. Put the puree in a small sauce pan and heat lightly. Add in the sugar and kirsch and mix.
2. Take off the heat and add the gelatin.
3. Pour into a bowl and let cool.


Raspberry Mousse:
165 grams raspberry puree
12 grams gelatin (softened in water)
10 grams raspberry liquor
30 grams sugar
170 grams fresh cream (36%)

1. Put the puree in a small sauce pan and heat lightly. Add in the sugar and kirsch and mix.
2. Take off the heat and add the gelatin. 
3. Pour into a bowl and let cool.

These next couple of steps need to be done quickly so first get everything organized. Decide which mousse you want on the bottom & top - it is up to you. Prepare the 18 cm ring by lining the inside with mousse film. Use the 18 cm ring and cut a piece of cake to fit in the bottom. 
Purees and cake are all ready to go
1. Remove the yogurt mousse and place on a plate and put back in the refrigerator.

2. We will use the passion fruit for the bottom. In a separate bowl, whip the 170 grams fresh cream until just becoming a little stiff. Whisk the passion fruit mixture so it is loose because it becomes lumpy when the gelatin starts to get firm. Add the whip cream to the puree in portions and mix with a spatula. Keep mixing and combining until all of the puree is well mixed. 
3. Pour the puree into the bottom of the 18 cm ring on top of the cake. Place the yogurt mousse on top. Put the in the refrigerator for at least 15 minutes so that the mousse starts to firm.

Mixing the raspberry puree and fresh cream
4. Now whip the 170 grams fresh cream for the raspberry mouse. Again, whisk the puree if it has become lumpy (may need to heat lightly if too lumpy). Add the fresh cream to the puree using a spatula in portions. Mix everything until well mixed. 
5. Take the 18 cm ring from the refrigerator and pour the raspberry mousse on top. Use a spoon to ensure the mousse covers all of the yogurt mousse and the insides of the ring. Smooth the top using a palette knife.
6. Put in the refrigerator for at least 1 hour before cutting.


After the mousse firms, remove the ring and the film. Drizzle extra puree for decoration.

Kathy
0 Comments

Toasted Almond Fig Tart


I found a package of figs in the store this evening that were on half price sale since they were a couple of days old. I don't bake with figs very often so I am quite curious what to make with them. I've seen many delicious looking recipes using figs but mine never came out so successfully.

This time around, I decided to lightly cook the figs in a sauce pan with butter and honey before adding them to the tart. This helped to get reduce the extra water from the fruit.

Recipe:
I used 3 figs for this recipe

Pre-cooking the figs:
1. Cut the figs in half and place in a sauce pan with one tablespoon of butter and one tablespoon of honey. 2. Heat lightly for about 15 minutes until the figs become softened then remove them and place on a plate to drain the juice.

Dough:
75 grams unsalted butter
45 grams powdered sugar (sifted)
20 grams toasted almond powder (sifted)
25 grams egg
125 grams flour (sifted)

1. Cut the butter into small pieces and blend with the butter using a bench scraper or your fingers. Add in the sifted powdered sugar & and almond powder and mix. Add in the egg.
2. Mix with a spatula until everything is well mixed. Shape into a ball and cover with plastic and put in the refrigerator for 30 minutes - 1 hour before using. This dough becomes soft quickly so don't handle too much.

Filling:
30 grams softened butter
30 grams powdered sugar (sifted)
30 grams toasted almond powder (sifted)
2 eggs
2 tablespoons dark rum
1. Use a small whisk to mix the butter. Add in the powdered sugar and mix. Then add in the almond powder and eggs and continue to mix. Add in the rum.

Putting everything together:
Fit the dough around the inside of the ring
1. Roll out the dough to fit a 18 cm tart ring. Fit the dough around the inside of the ring. Bake at 180 degrees Celsius for 15 minutes.
2. Take out of the oven and pour in the filling. Place the fig pieces on top of the filling.
3. Bake at 180 degrees Celsius for 25 minutes or until lightly browned on top.


Place the cooked figs on top of the filling
Kathy
0 Comments

Italian Panforte


Nuts, chocolate and dried fruits make this a delicious dessert
This dessert is quite easy and quick to make. It has a similar texture to nougat. I suggest that you prepare the baking pan before starting other processes. Once the hot honey and sugar is mixed with the nuts you need to move quickly to put everything together since the mixture can begin to become hardened.

This desserts keeps well and tastes just as a good even after several days. A perfect dessert to make  a day or two ahead of time if you are having company. You don't need to serve large slices to guests since it is rich. Also, it is better to cut before serving so that everyone can easily pick up a small slice to eat.

Traditionally, this dessert has pepper added to it. It is up to you to include or not depending on your taste or that of your guests.

Recipe:

30 grams walnuts
120 grams hazelnuts
90 grams almonds
100 grams flour
80 grams candied orange peel
30 grams candied lemon peel
85 grams dark chocolate
1/3 teaspoon cinnamon
1/3 teaspoon coriander powder
1/3 teaspoon nutmeg powder
1/3 teaspoon ginger powder
1/4 teaspoon allspice powder
150 grams honey
150 grams sugar

1. Prepare a baking ring by lightly coating the inside with butter and dust with cocoa powder. Place on top of a baking sheet.

2. Melt the chocolate in a bowl over a pan of  hot water.
3. Combine all of the nuts and and either chop to bite size pieces with a knife of use a food processor to cut.
4. In a bowl put the flour and then add the chopped nuts, spices and orange & lemon peel. Mix well.
5. In a sauce pan, heat the honey and sugar until about 125 degrees Celsius. Turn off the heat.
6. Pour the melted chocolate over the nuts mixture and mix quickly and then add the hot sugar/honey mixture and mix.
7. Pour into the prepared ring and press down with a spoon to neatly fill the ring.
8. Bake at 140 degrees Celsius for 30 minutes.
9. Remove from the oven and cool. Remove the ring and and lightly dust with powdered sugar.

Ready for baking
Kathy
1 Comments

Cookbook Published


My cookbook is now available on Amazon for Kindle and other compatible devices. This was several months in the making and I think I gained 5 kilos from testing the recipes. My next steps are to get back to exercising and work on another book.

All of the recipes are in both English and Japanese languages so don't worry that won't be able to understand something.

This is the link to Amazon Japan to buy the book. The link to Amazon.com to buy the book from the U.S. site is here.

Thanks to LeeLou Blogs for creating the beautiful cover.

Buy your copy soon and enjoy reading!
Kathy
0 Comments

Baked Mini Custard Apple Tarts


Mini baked custard apple tarts
 I can never pass up a recipe with apples.  This one has a baked custard combined with the apples which gives a great creamy taste to the fresh apples.

If you don't want to go to the trouble to make the mini tarts, you can always adjust and bake in one tart pan. If friends are coming over, the mini tarts makes the pies look extra special.

This recipe makes 10 mini tarts or one large 20 cm tart.


Dough
175 grams flour
90 grams cold butter (unsalted)
25 grams almond powder
70 grams powdered sugar
pinch of salt
35 grams eggs

1. Sift the flour and salt into a bowl. Cut the butter into small cubes and mix with the flour using a pastry cutter (use a food processor if you have one).  Butter should be well mixed with the flour.  
2. Sift the powdered sugar and almond powder and add to #1 and mix with the pastry cutter. Add in the egg and mix well. 
3. Shape dough into a ball and  cover in plastic wrap and put in the refrigerator for at least 1 hour before using. This dough becomes soft very quickly so do not handle too much when rolling out.

Filling
4 medium to large size apples

1. Peel and slice the apples. Put 1 tablespoon of butter into a frying pan and lightly cook the apples for about 10 minutes until they just lightly soft. Drain the liquid and put into a bowl when finished cooking.

Custard
250 grams milk
1/2 vanilla bean stick (remove the inside of the vanilla bean or use vanilla essence)
60 grams sugar
50 grams egg yolk
25 grams flour (sifted)
25 grams butter
25 grams fresh cream (36%)
Roll dough to fit tart pans
Fill with apple slices
2 eggs 
50 grams raisins

1. Combine the sugar and  egg yolks in a bowl and mix with a whisk.  Add in the flour and mix.  Put the milk in a sauce pan with the vanilla bean filling and heat until just boiling. Add milk to the egg mixture and stir then pour back into the sauce pan and heat until it becomes thick. Mix with the whisk while heating. After it becomes like custard consistency, remove from the heat and add the butter.
2. Pour into a bowl and cool for about 10 minutes.  
3. Mix the fresh cream and 2 eggs in a bowl. Add to #2 above and add in the raisins.  Mix with a whisk.

Putting Together
1. Roll out the dough and cut to fit the min tart pans. Fill each pan with slices of apples. 
2. Pour the custard mixture over the apples. 
3. Bake at 170 degrees Celsius for 45 minutes until well browned. 

Cover apple slices with the
custard mixture
Dessert is ready!
Kathy
2 Comments